My husband and I were driving around and spotted a "rummage sale" at a little church in New River, AZ. We pulled in and poked around to see what they had. Among the random stuff, I spotted a sewing machine cabinet. I poked through the drawers and noticed that they were not empty (more on that later).
I casually wandered over to the person in charge and asked how much for the sewing machine out front? She said, "$20". I exerted all of my control to avoid raising my eyebrows, fainting or expressing any other response that would give away the fact that the price was insanely low. "I'll have to check with my husband," I said, as I dashed over to where he was poking at some random dusty relics. "I need $20". He looked at me sideways for a few moments then quietly handed me a $20 bill. Smart guy. I did my best to not run but rather walk briskly over to the lady in charge and then told her I'd take the machine, and handed her the $20.
When we took the machine home, we took a good look at what we got.
A Singer 401A in cabinet with a LOT of extra attachments - many of which go with other machines I already own.
Let's see what we've got, eh?
The 401A, made in 1956, sitting cozy in its cabinet. Looks good so far (and actually reasonably clean).
Set up and ready to be plugged in to sew. Cabinet is in good shape. There are a few places where the trim is coming off, but a quick touchup with some wood stain hid the worst of it. A bit of furniture polish shined it up and made it look almost new (despite the clear '50s styling of the machine & table).
Give this old girl a lot of oil in every little nook & cranny, and she's ready to sew. Love the multi selector dials for different stitches.
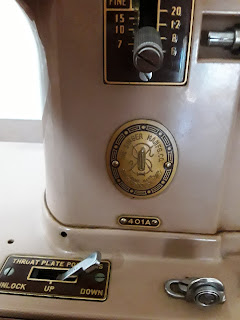
Top view, clearly showing the Singer Manufacturing Co logo.
The "secret decoder cheat sheet" showing the combinations of dial settings for each stitch for the machine.
Right side of machine, with my phone reflected in the knob. Shiny!!
If you weren't aware that the 401A is a slant needle machine, you know now. Look at that angle! Singer designed the slant needle machines to make the needle/sewing area more visible. The slant needle machine is a slightly more complex design than one with the needle / foot going straight up & down, so perhaps that is why there were only a limited number of machine models that used the slant needle design.
Bobbin case view - it looks very much like most other Singer machines of that era...but I'm sure there are some small differences since it's a slant needle instead of traditional vertical needle. Some engineers must have done an analysis on the differences and determined that the vertical needle is better because today it's nearly impossible to get a brand new machine with slant needle.
The badge and dials near it. You can see the model number proudly displayed. The 401A can do 6 - 20 stitches per inch.
Intense close up of the bobbin winder. The wheel is a bit battered, but I haven't seen any beige replacement wheels available. I have some black bobbin winder tires for other machines, but would prefer the correct color.
Showing off her innards. Scandalous!! Love that there's a diagram for threading included within the machine so you don't have to dig out the manual to figure out how to thread it. Also, note that the machine is surprisingly clean for its age. Usually I have to spend hours cleaning a new vintage find. This one must have been cleaned up by someone before it found its way to the church bazaar.
Card found within one of the drawers. I assume this was the card from the original owner.
The 9 cams that came with the machine. The 10th cam is actually loaded in the machine. It's the regular zig zag cam. The others are for handling various patterns. If you look at the outer edges of the cams, you can see the shapes they form and from that infer the possible stitches that match the cam shapes. Each cam has the stitch design engraved in it. I wasn't able to convince my camera to properly photograph the engravings, so use your imagination.
Below the cams are an assortment of feet that came in the box. Some of the feet are slant feet, but others are definitely regular Singer feet. It's likely that the previous owner kept the feet from other machines in the drawers as a convenience and then forgot they were there when selling the other machines. That would explain why we frequently come across machines without their attachments, and then later see a bunch of attachments for sale on their own.
These two boxes were in the second drawer. NONE of them are slant needle attachments. A few are the black colored attachments which were made during WWII. Neat that we have both the cardboard and metal boxes both in reasonably good shape. Glad I have several other machines that work with these attachments.
That long straight thin below the zipper foot is a sewing needle with a slightly curved, extra sharp end. I think it's meant for leather or other tough sewing. It could also have been used as a stiletto because it's so big.
The larger bottom drawer was the "treasure trove".
Here, we have a collection of random bobbins. Some are compatible with the 401A, others work with my other Singers. I think there were at least 4 bobbin styles/types in the container. Win for me because that's where I found extra bobbins for my Singer 15-91, 99, 221, and Spartan.
The electric scissors are an interesting find. I have seen these being used in some fabric stores to cut the fabric I'm purchasing, but I've never tried using them myself. I'm a little hesitant to try them for cutting out expensive fabric because I'm not sure yet how to control them when handling intricate cuts. I'll have to experiment with junk fabric before using these for anything nice. I'm wondering if the cord will get in the way.
The zipper repair kit is an interesting relic. Some day I may find a use for it.
Wowza, a Singercraft device, TWO stocking darners, a flatwork darner and the Singer Embroidery attachment!! This is the first time I have personally gotten my hands upon the Singer Embroidery attachment, and I'm eager to give it a try. The darners are interesting, but I'm not sure how much use I'll get out of them....I live in Arizona, so I very rarely wear socks these days.
Whee! Another buttonhole attachment with extra templates. This buttonhole attachment is in the green case, which means it's meant for the regular straight stitch machine. The slant needle button hole attachment is in a red/pink case, which means this attachment can't be used by the 401A. My other Singers will get to use this attachment when I have a whim to create buttonholes.
This is another attachment I haven't seen previously. Again, it isn't one compatible with the slant needle machine, but works fine with my other vintage Singers. It is a blind stitch attachment, which means it jiggles the fabric to create the blind stitch zig zag. I just Googled this attachment, and found them for sale for about $20, which means that if I sell this attachment, the rest of the stuff was FREE. Now, you understand why I so quickly handed over the money to the vendor! This was a treasure trove...but ~wait~ there's MORE!
Another attachment that I didn't have. This one also fits regular (not slant stitch) machines. This attachment allows straight stitch machines to do the zig zag stitch. So just like with the other attachments (above), this will wiggle the fabric from side to side to produce a zig zag stitch from a straight stitch machine. Again, another item that's selling for much more than the $20 that I spent to purchase the 401A. I'm planning to keep the attachments, of course, because I can use them, but it's great to know that these have far more value than what I paid to obtain them.
HAPPY SEWING.