Thursday, December 2, 2021

Wine-Der Woman Shirt


I found this image on Geek SVGs, a free SVG site that hosts Science, Technology, Engineering and Mathematics (STEM) SVGs as well as other geek-culture SVG images. It is, of course, a reference to Wonder Woman, but punning on Wine. Appropriately silly for me....

I opened the SVG in Silhouette Studio, and removed the two "V" characters below "Drink like a girl" mainly because I wasn't sure what they were supposed to represent. 

The words were already their separate from the wine glasses, but the wine in the glasses was part of the same compound path as the glasses. I wanted to use a different color for the wine and the glasses, so I selected the wine glasses, right-clicked and selected "Release Compound Path". 


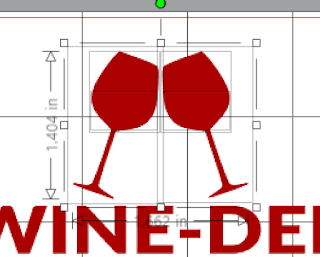
You may think, "that's not what I wanted". But wait - if you look carefully at the image, there are several lines within the glasses indicating that there are multiple pieces.


Here the pieces are separated. Because we want to have a wineglass outline, move the inside of the glass pieces back into the wine glass. Leave the "wine" pieces out since we will need to cut those from different color HTV from the wine glass. 


I changed the color of the interior wine glass piece to yellow to show that we have the two pieces nested. Select the wineglasses and choose "Make Compound Path". This will remove the yellow wineglass shape, leaving an empty wine glass shape.

Change the colors of the other sections, and assemble into desired final layout: 


Next, select HTV for each section. In my case, I selected purple glitter HTV for the words, silver holographic HTV for the wine glasses, and red holographic HTV for the wine. 

After setting up the image like this, I selected all elements and expanded it to about 11.5" wide by 7.4" tall. I have determined that a design just shy of 12" wide fits well on t-shirts for me. 

For cutting. since each color is a separate object, the design can be rearranged to help reduce HTV waste.
 

This arrangement allowed me to cut a 1" x 3.75" rectangle of red holographic HTV, a 4" x 5" rectangle of silver holographic HTV, and a 12" x 4" rectangle of purple glitter HTV. I then place the HTV pieces in locations corresponding to the objects shown in Silhouette Studio.


The above is what it looked like after I hit send. I moved the different color objects so that they better aligned with the lines on the cutting mat, making it easier for me to place the vinyl in the correct location.


Before hitting "Send" be sure to reverse the words. The wineglasses and wine don't have to be mirrored because they will look fine whether they are the "correct" way around or reversed. 

After it cuts, weed the design and put everything in place on the t-shirt. The backing for the wine and the glasses will overlap, and perhaps the backing of the words may overlap, so remove the wine and the words, and press for 10 seconds to set the glasses. Peel off the backing, then place the wine and words back where they belong. Cover the glasses with the original backing and then cover the whole design with a piece of teflon. Press the design for a good 15 seconds. 


That should stick everything down.  According to what I heard, if the HTV has sticky backing, it's a cold peel, and if it's a non-sticky backing, then it's a hot peel. However, if you're patient, any HTV can be cold peel. I tend to be a little impatient, so I usually try peeling off the backing as soon as it's cool enough to not be uncomfortable to touch. It's better to wait, but I usually get to eager to see the final result to wait. 


 Mirror selfie. This bathroom mirror shot better shows off how the colors really look. 

We won't discuss the fact that I put the wine in the wrong glasses - the original image had the wine level, and mine certainly isn't level. It's an "action" shot of the wine glasses because we're toasting. Yeah... that explains the violation of gravity in the glasses, right? Suuuuuuuure. 

HAPPY CRAFTING!!!


No comments:

Post a Comment

A Tale of Two Singer 15s : 1921 vs 1953. What Changed? What Stayed the Same?

 In my last post, I introduced my "newest" (yet oldest) Singer 15 ~ a Singer 15 manufactured in 1921 .  This wasn't my first S...