Thursday, July 22, 2021

Making Leather Earrings with Silhouette Cameo 4


I'd never imagined that making leather earrings could be so much fun and so quick for a project. I am not sure how many pairs I made, but I will tell you that they are surprisingly light - most of the earrings I made are around 2" tall and 1" - 1.5" wide. I'm not a fan of enormous earrings - I don't like them hitting my collar or getting caught in my hair - so I tried to keep them relatively small. 

The Synthetic Leather


For my earring-making adventure, I purchased the "SGHUO 30pcs Leather Earring Making Kit Include Faux Leather Sheets Glitter Metallic Leather Sheets and Tools for Earrings Craft Making Supplies" from Amazon. In addition to 30 different pieces of synthetic leather that measured slightly larger than dimensions given, it also came with some earring hooks, jump rings, pliers, thread snips, tweezers, bag, and a "jumper opener". 


  • I really liked the synthetic leather assortment - good selection of colors and descent quality product.
  • I am not a fan of glitter, so all I can say is that I was relieved that the glitter does NOT shed from the product. But if you like glittery stuff these no-shed glitter sheets will dazzle you. The metallic sheets have a bit of shine to them. The leopard prints are a thinner more plastic like material with lines carved in them reminiscent of fur. 
  • The little bag is a reinforced plastic bag with a zipper. It is just the right size to hold the leather pieces and keep them reasonably organized. 
  • I wasn't impressed by the tweezers - I think it's two pieces of stamped metal attached together at the top. They certainly are not for fine tweezing work as the points are rounded and much larger than expected. I tried using them for weeding vinyl, but had to switch to the tweezers that came with my serger to actually be able to grip the vinyl the way I wanted to grip it with the tweezers.
  • The thread snips are about the same as other thread snips of similar design - OK in theory, but don't expect them to be super effective. The can cut threads, but were challenged by the leather. I'm not sure why they were included in the package, but there they were. 
  • The pliers are regular jewelry-making pliers and work well for opening and closing jump rings. I had another pair of similar pliers but have mis-placed them, so it's nice to have pliers in my Silhouette Cameo tools pile. 
  • The "jumper opener" is a ring with slots in it which you wear on the tip of your finger and use to help hold the jump ring while opening or closing it in theory. I either haven't mastered the art of using the device or something because the jump rings never stayed in the ring's grooves long enough for me to use it to hold anything. It's big enough to wear as a pinky ring, but I believe it's meant to be worn near the tip of the index finger of your non-dominant hand. 
  • The earring wires and jump rings set consists of 5 colors: gold plated, silver, steel, black and a dark gray color metal. Color selection : awesome. Metals quality: meh. I liked the idea of having a good selection of different colored earring wires to allow color coordination between the wires and the synthetic leather pieces. I found several wires missing their coil and ball. I also had one set of wires that were intertwined in a strange enough way that I could not separate them. Several of the earring wires had such delicate metal that the loop at the bottom of the wire broke off when I handled it. My ears are sensitive (pierced over 35 years ago) and so I noticed that the back ends of the wires scratch against my skin and certain color wires made my ears itch a little bit. Usually the itchy ears indicates that the wires are not pure but rather are plated with one metal but have another as the main metal - one often sees this with cheap gold ear wires which have gold plating and a nickel interior. 

Summary

All in all, I think the set was worth what I paid. That is, I got my money's worth with all of the pieces of synthetic leather, especially since they were a smidge larger than dimensions given and are of reasonably good quality relative to the price paid. The little zippered bag is great for storing the leather so it doesn't wind up in a messy pile. So even ignoring the other items included in the package, I'm satisfied with what I paid.

Wires

If you have sensitive ears like me, stick with the silver and steel wires. You can test the other ones to see if they bother you, but be forewarned that the other wires are similar to the really cheap earrings we've all tried and found we could not wear. I can't guarantee that the silver and steel looking wires are what I'm calling them, but I can say that my ears are OK with them. The gold, brassy and black wires slightly irritate my ears, so test all 5 types to determine your ears' opinion of them and judge accordingly. You may have to find your own ear wires that work for you. 

Machine Settings

I adjusted my auto-blade settings slightly from the default settings for leatherette. The lesser blade depth did not cut through, and I found the higher force helped push the blade down into the material. I also chose a slower speed to ensure the blade had time to cut. The settings worked for me and cut through all the leathers pieces with nice clean cuts. 
  • Force: 33
  • Speed: 3
  • Passes: 2
  • Blade Depth: 8
I read on some web pages that you should cut synthetic leather with the pretty side down. I tried that on a few pieces, but found it cut better pretty side up. 


One word of caution: never cut glitter materials glitter side down because the glitter will stay on your mat and reduce its stickiness.

Be sure to use a relatively new mat that's very sticky, especially if the design has a lot of fine details. After I learned about reducing the stickiness of the mat by putting glitter synthetic leather glitter side down, I had several accidents that ruined a few pieces of synthetic leather because it came unstuck from the mat and got all bunched up. If your material comes unstuck from the mat and starts folding up under the cutter, immediately hit the "pause" button (looks like a sideways = sign), and remove the mat. Check the blade to be sure nothing got stuck in it, and check the machine to be sure all little pieces that came off the material have been removed from the machine bed. 

If your mat is losing its stickiness and you don't have new mat, you can use masking tape to hold the material down along the top and sides. This will work OK for simple shapes, but any with a lot of interior cutting may still wind up lifting off the not so sticky mat. Sometimes the cut will turn out OK even with a little lifting, but it won't look as nice as one that stayed stuck to the mat the whole time.

Earrings!

I made a pair of flower shaped earrings from the pink "fine" glitter material.


I used a free SVG from Design Bundles called "Flower-3.svg" to create them. The background is a plain brown synthetic leather piece. 

 
This is a two layer earring. I am illustrating it in the top earring by swinging the red teardrop away from the white one. This design came from a set of free cut files from "SewSimpleHome.com" 

This was a second design from the set of free cut files from "SewSimpleHome.com". Again, the white is a separate cut from the navy blue piece. I like the look of multiple layers. The background is the glitter "leather" from our leather set mentioned earlier.

This is an example of using both the very nice brown leather layered upon the leopard print material. The top earrings have the layers separated and the bottom illustrate what they look like when layered. The jury is still out as to whether I shall permanently separate them into single layer earrings because I'm not sure I like the color combination of that brown with the leopard print. The cut files for the earrings are here. The earrings are sitting on a piece of yellow glitter synthetic leather from my collection.

Butterfly in circle. I found this one at Craft House SVG, but the little details were a pain to weed out.
 If I had to do it again, I would have set the cutter to cut deeper or the pressure higher. I also would have used a new mat that isn't covered in glitter.

One important note that goes with this design: carefully remove the cactus from the inside of the other section because the cactus can be worn on its own. In fact, always check the shapes being weeded out when making earrings from leather because the negative spaces you remove can sometimes be used as their own designs.

This was a free design from Hey Let's Make Stuff of the Harry Potter "Deathly Hallows" symbol. Fun earrings. Default size is about 2.75", so next time I would make them smaller. 

These are made from the heavier glitter synthetic leather. I drew the teardrop design on the back of the material and cut with scissors. I wouldn't ask my Cameo to cut this material because the plastic-y glitter could damage the blade.

Showing back of the above glitter earrings. You can see the pen line where I drew the teardrop. The blue ones are larger and I don't like them as much as the pink because I think that the blue ones are a bit large for me. They may be fine for other people, but not my personal preference. Also, hand cut earrings don't come out as perfectly symmetrical as machine cut earrings.

Another example of a cut out design - the star - which can be used on its own as an earring, plus another double layer earring design with the cut out star being highlighted by the background blue piece. This earring file came from Amy Romeu's DIY Cricut Patriotic Earrings post.


I found that the easiest way to store my leather earrings was hanging them on a metal coat hanger that I am not using for anything else. It's wide enough to separate them so I can see each design. The only thing you have to keep in mind is that they will all gather to one side or the other if the hanger is bumped. Some may also fall off when you are pulling off the earrings you want to use for the day, so remove them slowly to avoid having to search for fallen earrings. 

HAPPY CRAFTING!!


Tuesday, July 20, 2021

Wheeler & Wilson Model 3. Made in 1871


Meet the Wheeler & Wilson Model 3. This one is Serial Number 636981, which was made in 1871, according to a document I found and according to the Serial Number chart from Fiddlebase.com (which sadly is actually gone and only available using the "Wayback Machine" of archive.org).


I was able to identify it as a Model 3, based upon this article from ISMACS which describes each of the models Wheeler & Wilson made. The Model 3 is pictured in Fig. 4 on that page


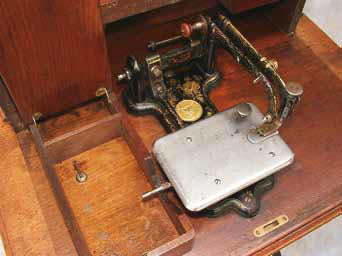
The most interesting factoid about this machine is that it moves the fabric from LEFT to RIGHT as it stitches. All other sewing machines that I have personally encountered move the fabric from front to back as they sew. The photo above is of a Wheeler & Wilson just like mine except its in a cabinet. You can see that the front of the foot is pointing to the left. The bar sticking out on the right (which gets hidden when sewing by the cover toward the rear of the photo) is the bobbin winder. The bobbin is pushed onto that shaft, then the treadle belt rotates it while the bobbin winds.

An interesting comment about the machine:  "The machine takes some getting used to, feeding from left to right, but, if you had used one for years, changing to a more conventional machine might have frightened some."

A second interesting factoid about this machine is that its treadle belt is a wide belt as opposed to the narrow round belts seen on most other treadle machines.  

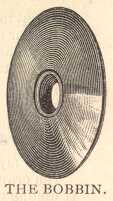
The bobbin is unusual in that it's very flat and thin like a pancake. 


Showtime!

Let's take a closer look at the Wheeler & Wilson Model 3 machine:

When I first looked at it I thought this was the front because the toe of the foot faced front. That would make it "backwards" compared to most other sewing machines which have the needle on the left. Once I found the photos of the machine attached to its treadle base, I learned that this is the left side and that the shaft facing us is the bobbin winder which goes inside a wooden box which was part of the treadle base. 

The cloth plate bearing the serial number and a list of 4 patents from Mr. Wilson.
 The direction of the printing was a hint that the machine was to be used with the foot pointing to the left and the material moving left to right (because that was the orientation in which the lettering on the cloth plate was right side up). 

The badge on the bed of the machine: "Wheeler & Wilson MFG, Co, New York. 625 Broadway".

Top view of machine. The right-most bar holds the presser foot against the cloth plate, and the needle bar to its left moves up and down. The needle is slightly curved and the presser foot has a glass section which has two holes in it. There is a hole on the right side of the needle bar that can be used for feeding cord into the front hole of the presser foot for couching down narrow cord (the cord must be narrow enough to fit through the hole in the foot, of course).

Front view of machine. Ready for stitching.

Close up of foot and needle. Note that the whole foot is NOT metal. There is a clear glass piece in its center so that one can see the stitches as they are being formed. I have seen attachments for this machine, and apparently the glass piece can be removed then replaced with a different piece. The metal part of the foot cannot be removed. My machine's glass piece appears to be stuck in place. I'm not sure if it's simply because the glass has been in place for so long that it's just jammed in there, or whether perhaps this model did not have removable glass foot inserts. The "Standard" foot has only one hole in the glass. This foot has two - the one to the left of the needle in this picture would be used for feeding cord through the foot so it can be sewn down upon the fabric being stitched. 

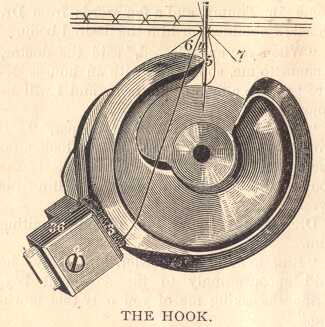
Right side view of machine where bobbin case is visible.

Bobbin removed from case to show its size.

Very flat bobbin. The space between those plates is just barely wide enough to fit a piece of thread.

Bobbin case without bobbin

Bobbin loaded. 

Another view of right side. I attempted to feature the gold decorations on the two arms of the machine.

Back of the machine. The shiny metal bar is the spool holder. 

Looking through underside from the back to see the pulley for the belt. The pulley looks like a large thread spool covered in leather.

Left side from down low to see details

Bobbin winder. It's obvious why that was covered with a box for sewing because otherwise it would catch on the work and wind it up rather than let it pass by smoothly.

Underside of front to showcase the belt pulley.

Angled view to catch another peek at the interesting bobbin case.


Close up of needle and foot with needle raised. You can see that the needle is curved slightly. It's not a sharp curve, but it's definitely curved. Of course, the way it's so far out from the other parts makes me wonder how many people accidentally stitched through their fingers!

Needle down view. You can see there's a second needle hole in the foot and that the needle bar has another opening which could be used to help feed cording into the hole in the foot.  

Hope you enjoyed looking over the Wheeler & Wilson!

HAPPY SEWING.


Sunday, July 18, 2021

GraybaR : It Followed Me Home!


Today, we decided to go on a little adventure driving around Phoenix. We stumbled upon the Brass Armadillo Antique Mall and decided to poke our noses in to see if there was anything of interest there. 

Indeed there was!!

I spotted some treadle machines - a Singer 15, a Butterfly ("Made in China", but it looked very much like the Singer 15), and a really beat up looking one (forgot the brand, but it was very rusty and seemed to be missing parts). I also spotted a White Rotary 77 in a suitcase which is probably a relic of the 1950s. I was considering purchasing the White, but really didn't get that "take me home vibe" from it.

Just as we were wandering down the last few aisles, I spotted the GreybaR (look at the machine: they capitalize the "R" at the end of the name. I'm just imitating their spelling). This little guy was begging me, "Please take me home." Ok, I'm a softie, so I purchased it and took it home safely seat-belted in the back of the car. 

It's challenging to find information on GreybaR, so all I can go by is the badge underneath which says "Model RBR". I don't see a serial number anywhere on it, so I can't put an exact manufacture date on it, but it does have two patents listed on it: 1711792 (1929) and 2001966 (1935). 


Both patents are assigned to the National Sewing Machine Company... and when we look at the underside, we see the NSMCO badge listing the model number "RBR":


This correlates to the article I found on the Greybar, which mentions that the GreybaR machines were made by the National Sewing Machine Company. I haven't found any dating information for the machine, so I only know it was made after 1935 (date of second patent listed), and I'm guessing by the electrical connections that it was made before the 1950s, since I think that's about when they moved away from those odd round 2-prong plugs. 


One plug attaches the power cord and the other attaches the pedal.

Interesting factoid: the pictures don't seem to show it, but this machine is actually a dark chocolate brown rather than the usual black one sees with machines of similar vintage. I don't know why it looks black in most of the photos. I guess it's the lighting in my sewing room? Or perhaps it's my camera that's adjusting the color? 

Time for the GreybaR fashion show (you've already seen the front):

Close up on the bobbin winder flipped up into winding mode. The lever down below appears to be stitch length selector. I haven't yet experimented with its settings so cannot comment on it other than I'm guessing the numbers are stitches per inch since that was standard for many American machines.

Bird's eye view of top of machine.

So, what's under the spool pin? The plate has a big hole labeled "Oil here," so we definitely need to put some oil in there before sewing. 

Totally retro looking design on this side plate. Has late 1930s vibes to it. Also, without a manual, it's going to be fun figuring out how to thread it. I saw a National Sewing Machine machine that has similar plate on it, so hopefully I can find a manual for the NSM machine which will work for this GreybaR. 

Pulled off that plate to check out the innards. Glad to see it's not full of crud and rust. Just a little dry, but one expects that in Arizona (I have found that I have to oil all my machines more often in Phoenix's dry climate than I had to when I lived in Oregon - chalk that up to drastic humidity differences). Thankfully, I've oiled enough machines to have caught on to where it needs oil without having to look it up - basically, if two metal pieces touch, it's a good spot to drop on some oil.

Needle plate rotates to the back to provide access to the bobbin and case. Interesting bobbin case - it's a bit different from most of the other machines I've seen. The bobbin looks like its center hole is larger than what is usually seen on Singer models. I will check my bobbin collection to see if I have any other bobbins that are the same configuration as this one. 

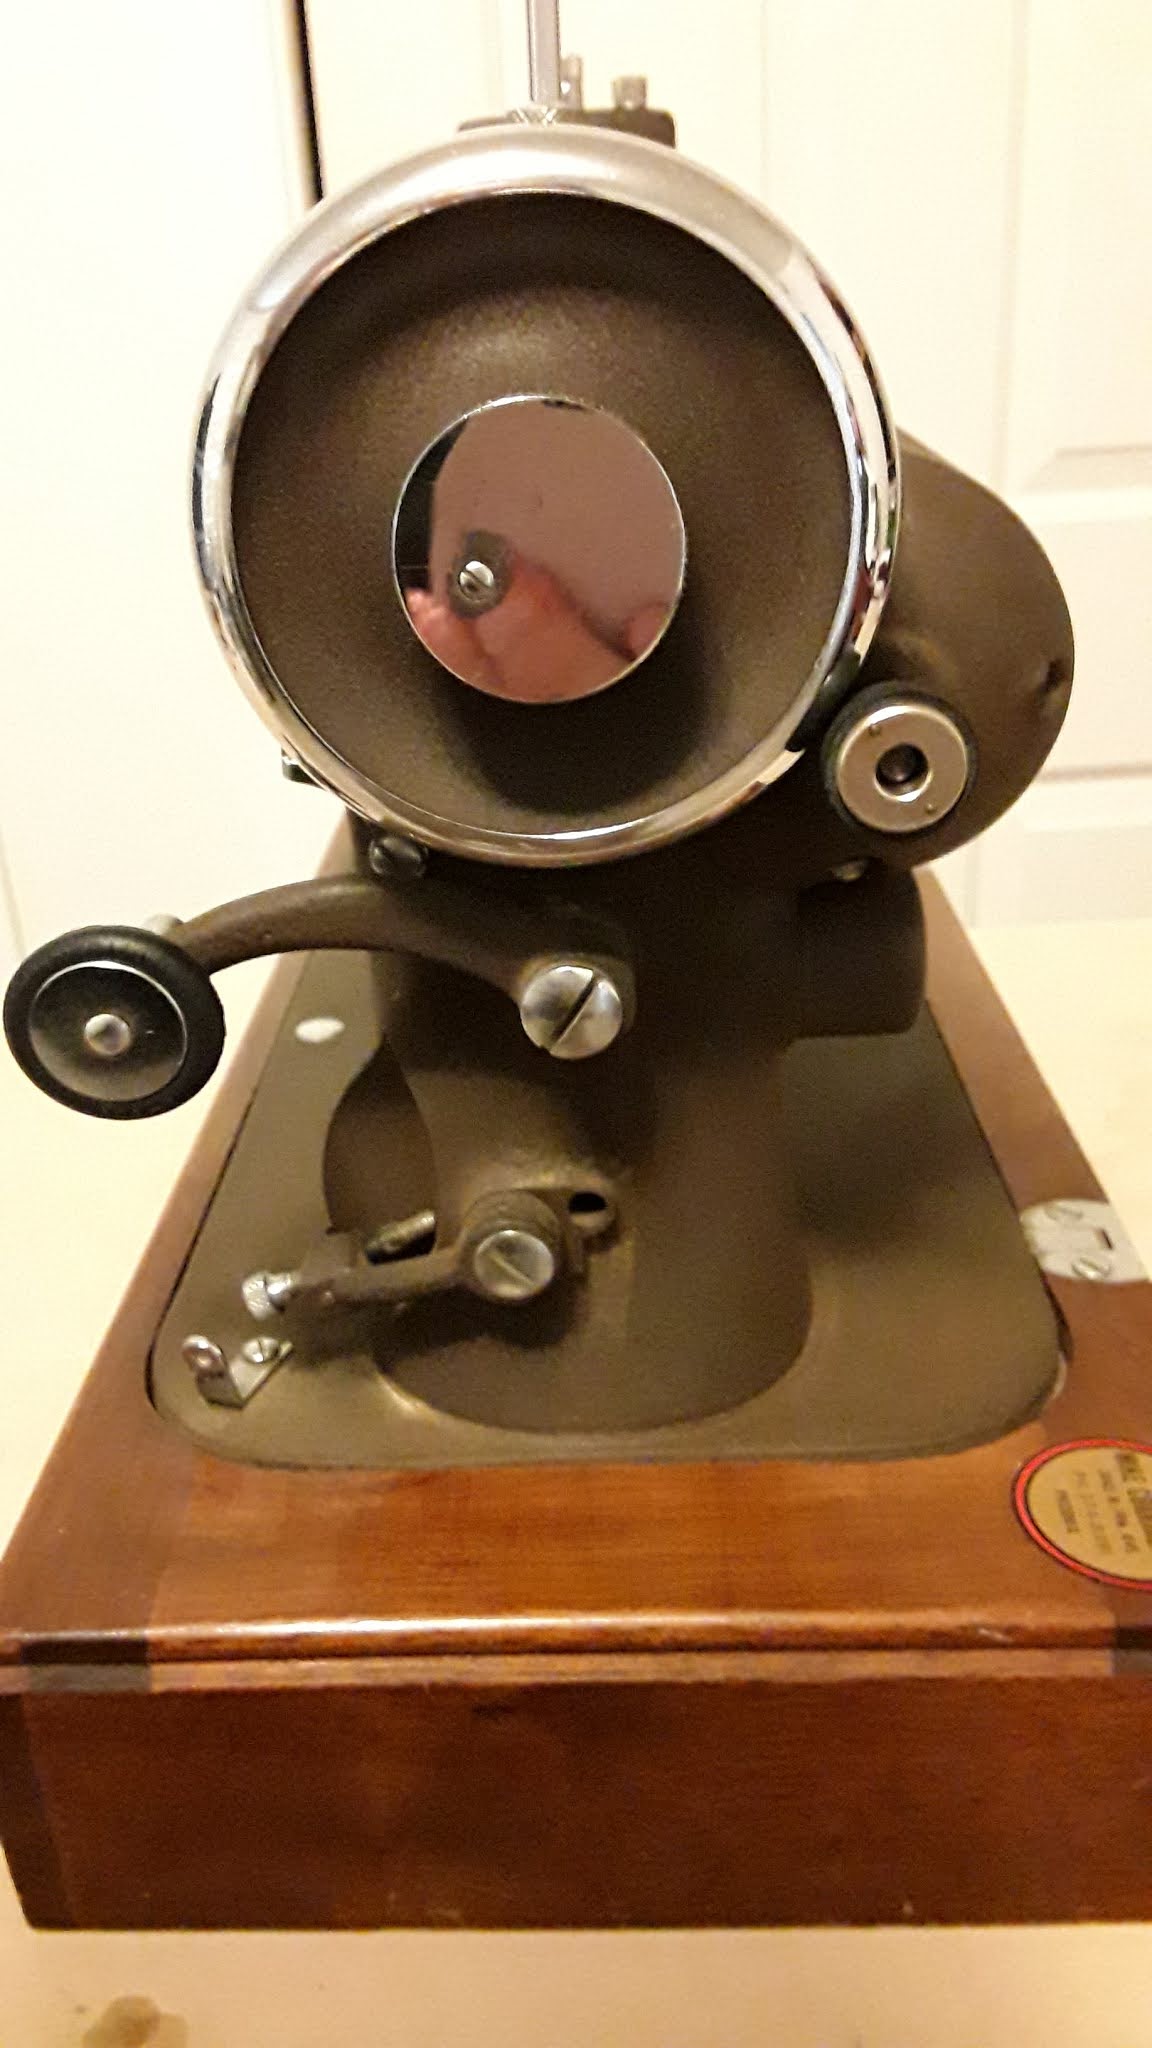
Back side. The light is cast as part of the rest of the machine as opposed to being a separate object like some other machines I've seen. The motor is also cast in as part of the machine, which differs from many other machines of this time period which typically have a motor that's separate from the machine. Also note that small wheel to the left of the motor  - instead of needing a belt, this little wheel is spun directly by the motor and the wheel in turn rotates the larger wheel to move the needle up and down. 

Right side view. Interesting how the stich length lever is on the outside of the machine. You can also see the wheel from the motor which drives the machine. Bobbin winder is lifted half way. I found that if I push the bobbin winder all the way down, it gets in the way of the stitch selector. 

Underside of machine. Thankfully, it's pretty clean. Just needs lubrication.
 Oh, that latch you see at the top of the photo locks the machine down on the wooden base. It takes coordination to push that button and tilt back the machine without getting pinched or losing your balance. The machine tips the scales at 27.9 lbs, so it's pretty hefty, but not insanely so.

Looking up the main post from the bottom. I think that's old grease which looks a bit yellow in this photo. Will have to clean that up before using and re-grease it with new grease.

Other end of the shaft on the underside looking up at the bobbin case on left.

Bobbin case. Interesting that it's got these indentations on both sides where you can grab it to remove the bobbin.

Foot pedal. Total retro look here. I'm not sure about the gnarled wheel on the right side. Does it have a purpose or is it just a funky design?

Side view of the pedal. You can more clearly see the gnarled wheel on the upper right here. It spins, but doesn't seem to have much of a purpose as it doesn't appear to be connected to anything significant. 

So, that's the story of my new toy. I'm glad to say that it seems to run well - that is, we plugged it in and pressed down on the pedal and the needle moved up and down smoothly and quietly. I'll have to come up with a project that I can have it work on for me. 

I only have the one presser foot that came with it, however, I think it can be compatible with some of the random attachments that I have in my stash (some of my machines came with attachments that don't go with them so it's experimentation time!!)

Hope you enjoyed meeting the GreybaR. 

HAPPY SEWING!

Fun with Cricut Infusible Ink

  I broke my favorite coffee mug a few days ago 😭.  Naturally, that means I need a replacement, and of course nothing available on the mark...